Bimbo111's Hackerspace build

Built a scanner? Started to build a scanner? Record your progress here. Doesn't need to be a whole scanner - triggers and other parts are fine. Commercial scanners are fine too.

Moderator: peterZ

bimbo111
Posts: 46
Joined: 11 Aug 2012, 12:12
E-book readers owned: iPad
Number of books owned: 0
Country: Denmark

Bimbo111's Hackerspace build

Post by bimbo111 »

Hi again bookscanners!

After posting some questions in this thread (some more intelligent than others) i made a deal with a local woodshop and got my parts:

Image

I will use this thread to share my building process and post questions. If anyone wants to try and get the parts cut by a pro, i will start out with some hints :) :

First you will get the latest drawings from this link:
http://www.diybookscanner.org/DIY%20Boo ... %20920.zip

I doubt that any woodshop will just cut the parts straight off the zip file above as i hoped in the first place. This is because the cad-files in the zip-file are in two dimensions and don't currently exist in 3d. A project has been started to do the 3d-files but has not yet been completed. Instead the zip-file includes a PNG-file that defines the depths.
You need to spend some time on the forum and get an overview of the project. These threads are what i've been using:

Build Thread for the Hackerspace Scanner Kits
This thread has loads of links to Daniel showing how to put together the parts. This way you'll get an idea of the functions of the individual parts. This helped me to get an idea of what areas of the parts needed to be routed in what heights.

A DIY Book Scanner In Every Hackerspace /DIY Kit
This thread includes a shopping list as well as assembly instructions in 'paper form', which can be handy.

When you get an idea of how the parts are supposed to look you can help the guys at the woodshop to do the settings for the cnc. I'm not sure every woodshop will agree to this kind of cooperation, but i think it's necessary.

Anyway i started my building process this night, but found out that i was missing the cradle base :( I think that we accidently forgot to cut it at the woodshop, but i have haven't paid the guy yet so i'm sure ill get my last part :)

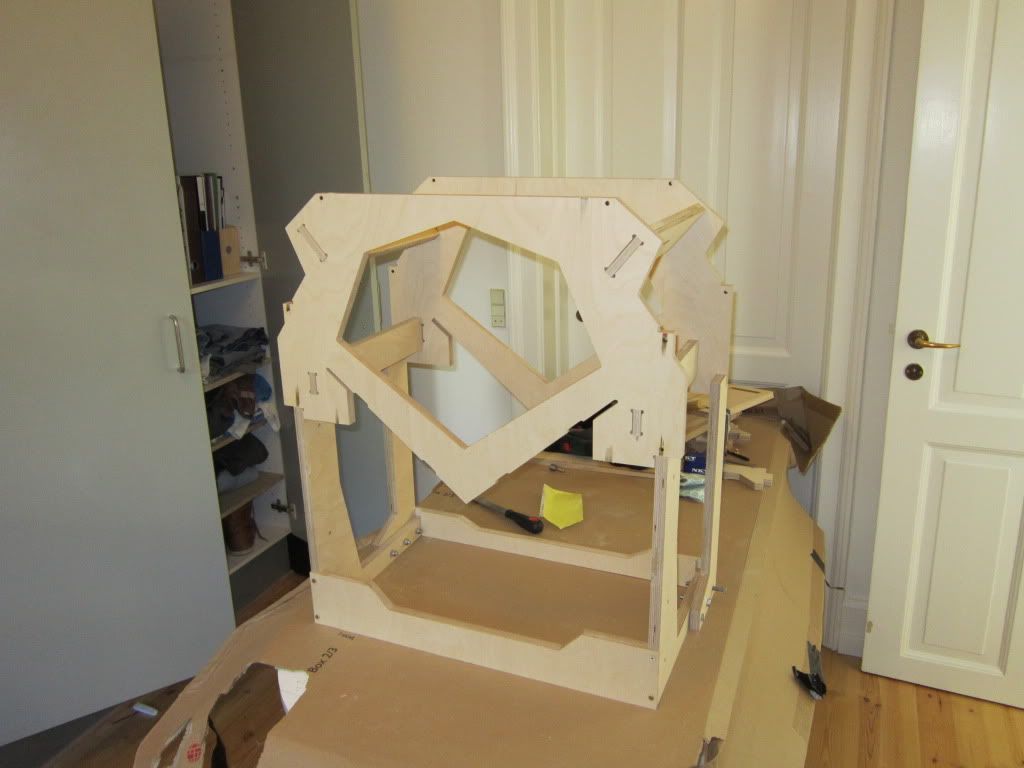
I've put together the base now with some hassle, since my table is nothing but leveled. I ended up doing most of the job on the floor instead. Anyway it seems allright now.
Image

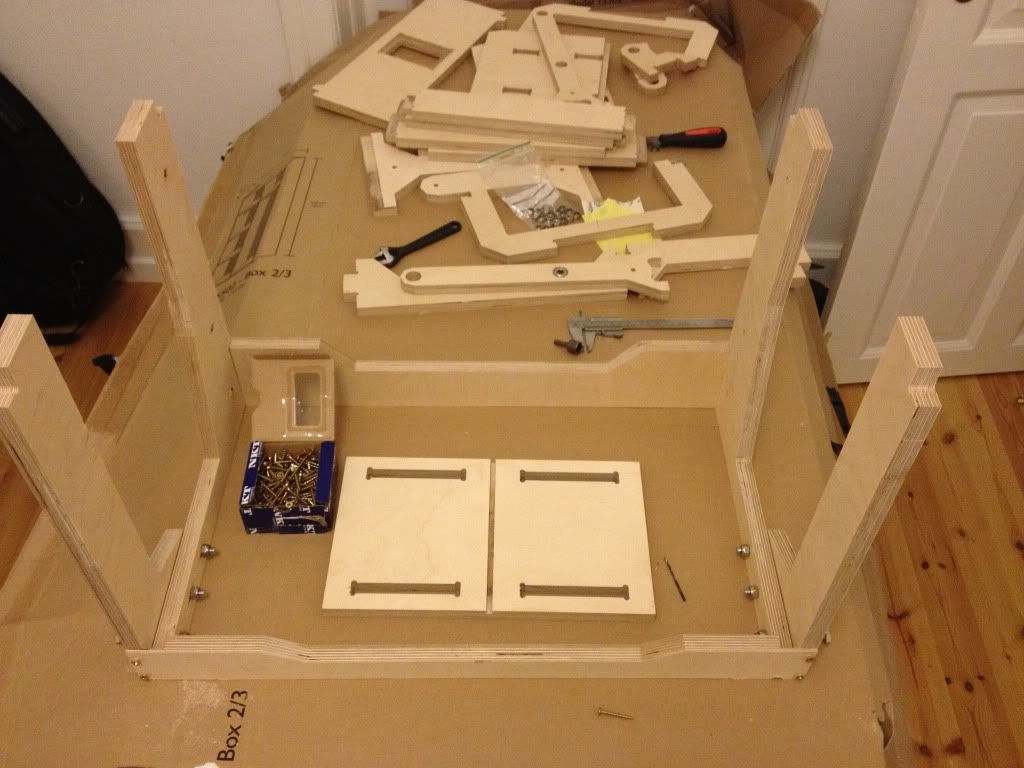
This image tells quite some things.. As you can see the rear panel has an error - and some of the other parts do as well. Mostly due to insufficient tapping. But as long as the parts are functional i don't mind.
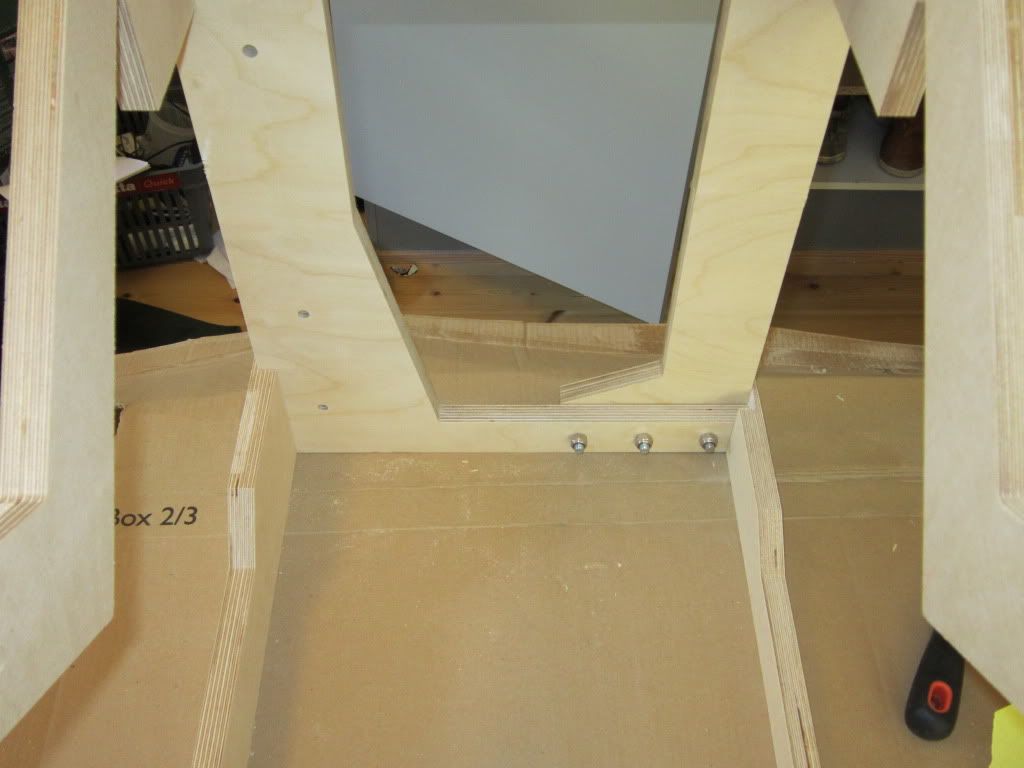
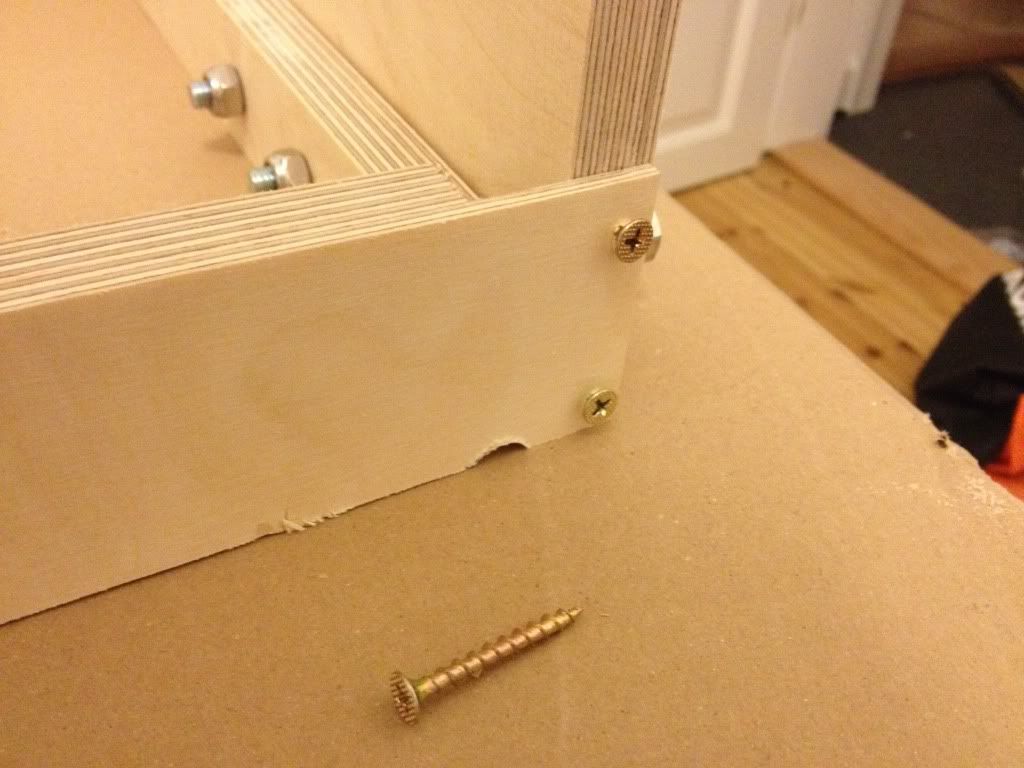
I'm not sure i got the right screws though. I don't dare to put them all the way in, since i'm afraid to crack the thin wood of the panels, and i didn't have the tools to countersink (i'm not sure the wood is thick enough to countersink?). Have anyone had experience with this? Have you been using screws with 'flat' heads? Also do they look like they are the right length?
Image

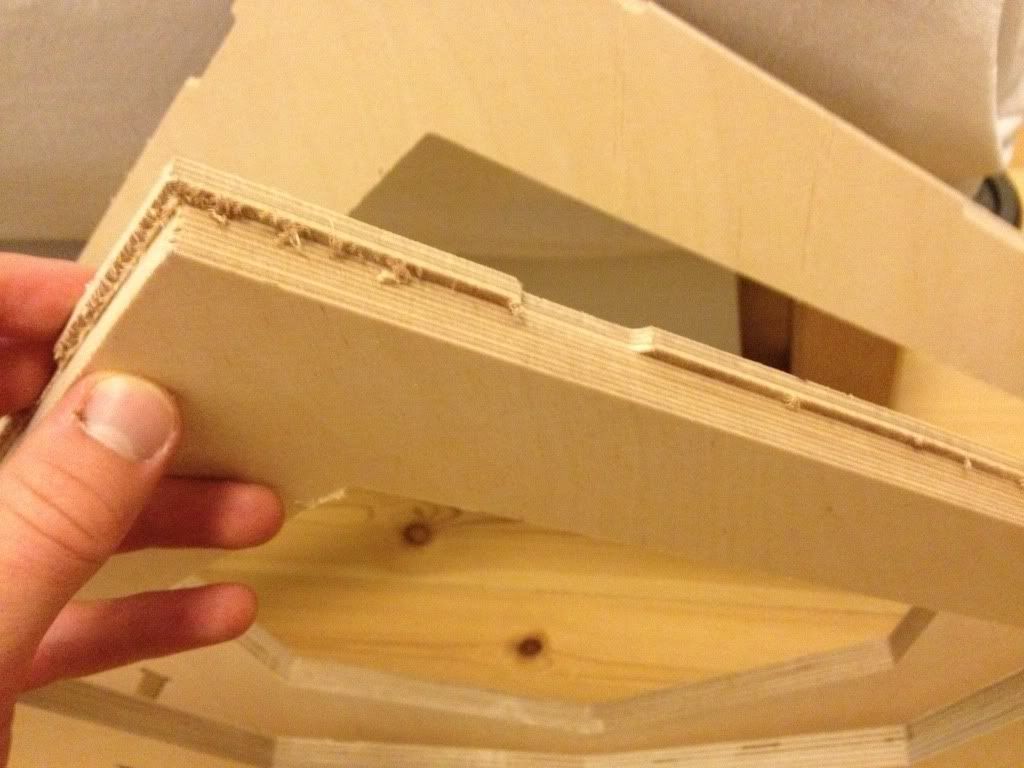
Also you will notice that the routing in some areas like these holes could be cleaner. If you have any advise i could pass on to the woodshop feel free to post it.
Image

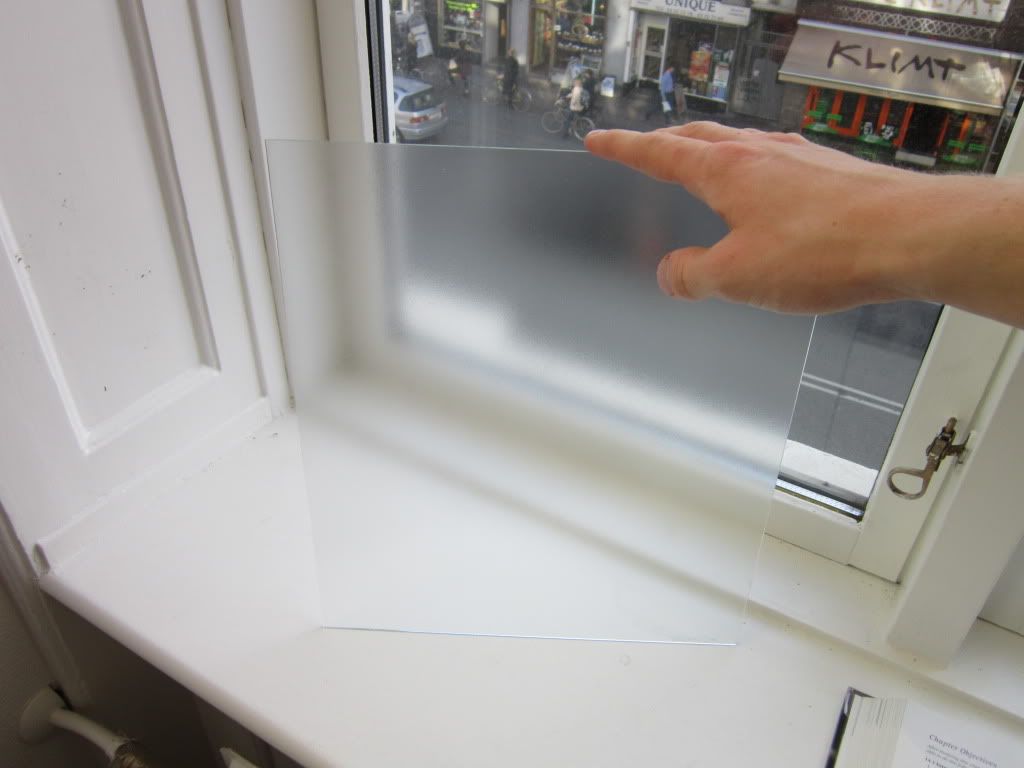
The guy at the shop was a little worried about the thickness of the 'lip' at this part, so we made it a little bit wider. I couldn't see a problem at the time. I thought it was just a matter of using another piece of glass, but i came to think - is the size of glass originally used some kind of standard size, that wont fit now? :S
Image

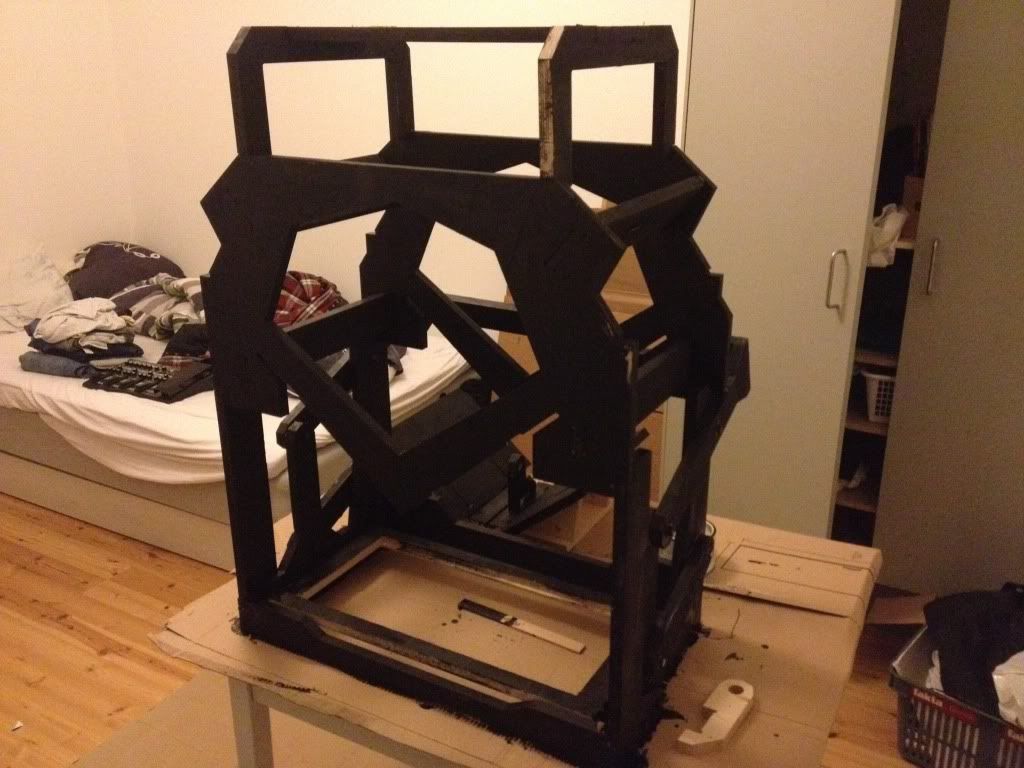
Updates comming in the not too distant future, though i'm pretty busy at school.
Feel free to post whatever you think! :) --- Regards Bjørn (from Denmark)

(Btw. just to clarify: I'm a dude! i KNOW my username is a bit girlish! It's a long story... Anyway don't get any funny ideas about me waltzing around naked with my screwdriver! You proberbly wouldn't like the sight!)
bimbo111
Posts: 46
Joined: 11 Aug 2012, 12:12
E-book readers owned: iPad
Number of books owned: 0
Country: Denmark

Re: Bimbo111's Hackerspace build

Post by bimbo111 »

Most of the stuff regarding the cameras i bought (powershot a3300) will be held in this thread.
User avatar
rob
Posts: 773
Joined: 03 Jun 2009, 13:50
E-book readers owned: iRex iLiad, Kindle 2
Number of books owned: 4000
Country: United States
Location: Maryland, United States
Contact:

Re: Bimbo111's Hackerspace build

Post by rob »

For the screws, we all use the same kind of screw you have -- with a tapering head. With a countersink tool, these work well, even in the thinnest piece of wood since you can drill with the countersink bit as gently as you want. It's a little hard to tell from the picture, but I *think* they might be the right size. You want a screw that goes through 1.5 thicknesses of wood (so figure 18+9 = 27 mm at least).

For the glass... I guess it depends on where you get your glass from. In the U.S., you can get the glass in standard sizes -- although they're not really standard, they're just what the big corporate home improvement store happens to sell. However, the store can also cut the glass to size, so you shouldn't have a problem if you get the machine measured, and then the glass cut to that size.

As for the ripped wood, I think that's what happens when you don't have good support underneath the wood. When the bit goes through, if the wood isn't supported well -- and I mean supported flush up against the wood -- you'll get tear-out like this. The same trick is used whenever you want a nice finish: clamp the piece tightly to a scrap piece, and cut through both. So you pretty much have to have a nice, flat bed without grooves in it.
The Singularity is Near. ~ http://halfbakedmaker.org ~ Follow me as I build the world's first all-mechanical steam-powered computer.
spomwii
Posts: 69
Joined: 17 Jun 2011, 07:57

Re: Bimbo111's Hackerspace build

Post by spomwii »

Hei Bjørn,

Have you tried to find anyone who sells glass in Denmark yet? I am having a hard time to find anyone selling anti reflecting glass here in Norway. I have found a provider that has "museum glass" but they only have 2mm thickness. I have ordered a kit from diybookscanner.eu.

Good luck with your project :)

Tommy.
bimbo111
Posts: 46
Joined: 11 Aug 2012, 12:12
E-book readers owned: iPad
Number of books owned: 0
Country: Denmark

Re: Bimbo111's Hackerspace build

Post by bimbo111 »

@rob
Thank you for your answer :) I just started countersinking the screws - it turns out alright. The drill Dan uses in his videos does it countersink at the same time? I've been using just an ordinary drill.

@Tommy
Hej Tommy. Jeg er ikke nået så langt i mine bekymringer endnu.. Jeg regnede faktisk ikke med at det ville blive et problem, men det er altså ikke noget man kan få hos den lokale glarmester?
---- And for you non-scandinavians ----
Hi Tommy. I have not yet worried about the glass.. I didn't think of it as a problem but what you're saying is that it's not something you can get at any glazier?
(wow.. i just realized how bad i am at directly translating stuff :) I keep refrasing everything! )
spomwii
Posts: 69
Joined: 17 Jun 2011, 07:57

Re: Bimbo111's Hackerspace build

Post by spomwii »

It sounds so easy to get glass in US. You can just walk into any hardware store and buy it for a few dollars. So I thought it would be no problem here. But it looks like we do not use much of that kind of glass here.
But I might have found a provider today that is selling some kind of Acryl glass used in museums. A man from the company will call me later today but it sounded like it was very expensive.
bimbo111
Posts: 46
Joined: 11 Aug 2012, 12:12
E-book readers owned: iPad
Number of books owned: 0
Country: Denmark

Re: Bimbo111's Hackerspace build

Post by bimbo111 »

Assembled the top peice today and took a demo picture with the camera in place:

Image
Image

@spomwii
I just wrote a local dealer - let's see what he has to say about it.
bimbo111
Posts: 46
Joined: 11 Aug 2012, 12:12
E-book readers owned: iPad
Number of books owned: 0
Country: Denmark

Re: Bimbo111's Hackerspace build

Post by bimbo111 »

I have come a little further with my scanner even though i havent got my last part (will get it tomorrow i hope). Today i went to buy the glass, but was first met with the price of more then 70€ for the 'museum glass', so i phoned another dealer who said he had some 'anti-reflection-glass' for 1/5 the price of the other place. This however is not suited, since it disturbs the picture as you can see below. Fortunately i bought a 'standard' piece of glass as well, which turns out all right. I'm not sure how it will deal with the LED-light however.

Here you can see a photo of an illustration and a word. The anti-reflektion glass on the right and the regular glass on the left. The lightning was just normal daylight with no flash. I'm hoping to acheive a little more contrast when using the LED in darkness.

Image
Image
Image
bimbo111
Posts: 46
Joined: 11 Aug 2012, 12:12
E-book readers owned: iPad
Number of books owned: 0
Country: Denmark

Re: Bimbo111's Hackerspace build

Post by bimbo111 »

Painted the scanner. Needed to buy regular paint instead of the spraypaint i bought this summer... Too damn cold outside to spraypaint. Still missing some spots. Progress with the cameras as well.

Image
User avatar
daniel_reetz
Posts: 2812
Joined: 03 Jun 2009, 13:56
E-book readers owned: Used to have a PRS-500
Number of books owned: 600
Country: United States
Contact:

Re: Bimbo111's Hackerspace build

Post by daniel_reetz »

Glad to see more progress bimbo111! I'm really pleased to see your build coming along. Sorry about the glass situation - it's a mistake that happens here over and over. Anti-reflective glass with an Anti-reflective coating is quite expensive (between 75 and 200/sheet). It's good. Anti-glare glass has a matte finish and generally destroys image quality. I'd guess it's been tried ten times or more. Plain old "float glass" or "double strength" or "3mm glass" or "window glass" is a good low cost option. Better than acrylic or polycarbonate, too.
Post Reply