David,
Thank you a lot for your build and excellent guides. The documentation for the frame is really perfect. But I haven't found the size of your acrylic and mdf details. Could you please specify these?
A new scanner design using plastic tubing
Moderator: peterZ
Re: A new scanner design using plastic tubing
UPD: I've found it.
Re: A new scanner design using plastic tubing
Thank you for all the work you have put into this and for sharing it with us.
You actually inspired me to get up and make a bookscanner - Thanks a lot for that as well.
I have had to make some changes regarding choice of materials because of availability and prices.
I will substitute some of the plastic tubing for wood - notably the base framework. The design itself will remain unchanged.
My platten size are about 30cm X 40 cm (about 1ft x 1ft 4in)
Status as of now is that the Platten are glued with epoxy and that should be as strong as the plexiglass itself.
The book holders are fabricated and work has started on the platform for the bookholder.
Tomorrow i will finish the base and base framework. I am waiting for an order of tube connectors to make the rest of the structure.
Some pics:
- Attachments
-
- Platten glued
- 20160723_153319.jpg (44.54 KiB) Viewed 11316 times
-
- Book supports
- 20160724_231034.jpg (177.61 KiB) Viewed 11316 times
-
davidlandin

- Posts: 134
- Joined: 22 Feb 2012, 15:44
- E-book readers owned: kindle
- Number of books owned: 0
- Country: UK
Re: A new scanner design using plastic tubing
Hi Kurt
Sounds very interesting to make the scanner from wood. I would very much like to see photos of the finished product!
David Landin
Sounds very interesting to make the scanner from wood. I would very much like to see photos of the finished product!
David Landin
-
Louroboros
- Posts: 5
- Joined: 03 Sep 2016, 15:22
- E-book readers owned: Sony
- Number of books owned: 99999
- Country: US
Re: A new scanner design using plastic tubing
Hi David - I found this thread probably a year ago and knew I would get around to building a version of your scanner eventually, and this is the time! Firstly, I wanted to thank you VERY MUCH for your extensive work in the past few years introducing this to the world and then continuing your generosity by helping everyone who has posted questions (like I'm getting ready to do)!
I've gone through every page of this thread numerous times and downloaded your guides and looked through your Instructable (http://www.instructables.com/id/Book-Sc ... /?ALLSTEPS) as well, so it's possible I've missed something, or my brain has melted from studying this too long, so please set me straight if I'm way off base on the following!
I think there might be a discrepancy between your 'standard' size scanner measurements and the larger 28cm X 35cm (11" X 14") scanner as it's posted in your Instructable. I primarily used most of your Instructable info, instead of your Google Drive info downloads (discussed on page 4 & 5 of this thread), which is where I ran into difficulty when I went to start cutting my pipe.
According to your Google Drive file (https://drive.google.com/file/d/0B7STuk ... sp=sharing), the total width of your 'standard' scanner, 22cm X 35cm (8.5" x 14"), is 45cm (@ 17.75").
The Google Drive file (https://drive.google.com/file/d/0B7STuk ... sp=sharing) says the total width for the larger scanner is 56cm (@ 22"). [I used your 1st draft of the 11" X 14" scanner, as your diagrams for the second draft of this file didn't seem to be completed; eg: measurements in your diagrams were not the same as your 1st draft, and extremely short, like you were in the middle of changing them and it didn't get completed...? See thread page 5]
Although the parts list for your Instructable says it's for a 28cm X 35cm scanner, I'm pretty sure the diagrams in parts 3-6 for the counterbalance frame, support and base are for the standard size scanner. I've looked and looked through the comments, both here and on Instructables, but don't see anyone else saying so, so I'm not sure if I'm going crazy or what.
Is it just me? If I've lost my mind I hope you'll tell me so; I've just been pulling my hair trying to figure this out! If it wasn't for your excellent explanation near the bottom of page 4 of this thread, and your very helpful computer drawing on the top of page 5, I would have cut a whole bunch of tubing too short.
I've got nearly all of my parts, including the cameras, so I'll be posting pics as I progress! I'm on vacation this week so I'm going to get as far as I can with what I have. Thanks again, SO MUCH, for making this available to everyone and giving me the opportunity to share some of my library with others!
All the best to you!
-
davidlandin
- Posts: 134
- Joined: 22 Feb 2012, 15:44
- E-book readers owned: kindle
- Number of books owned: 0
- Country: UK
Re: A new scanner design using plastic tubing
Hi Louroboros
Thanks for your long message and questions.
I have got a scanner in the house at the moment - normally it is being used in a library. So I am going to do a full measurement of the entire machine, which I will post. However I am away for 2 and a half days this week, and I am working ofn a few other projects as well. But I will do what I can to get the full dimensions posted soon. Hope my promise is not in vain!
Sincerely
David Landin
-
Louroboros
- Posts: 5
- Joined: 03 Sep 2016, 15:22
- E-book readers owned: Sony
- Number of books owned: 99999
- Country: US
Re: A new scanner design using plastic tubing
Hi again David - I wanted to post a couple of pictures of what I've done so far, and re-clarify what I wrote in my previous post. First, here's a pic of the tubing framework, mostly completed:
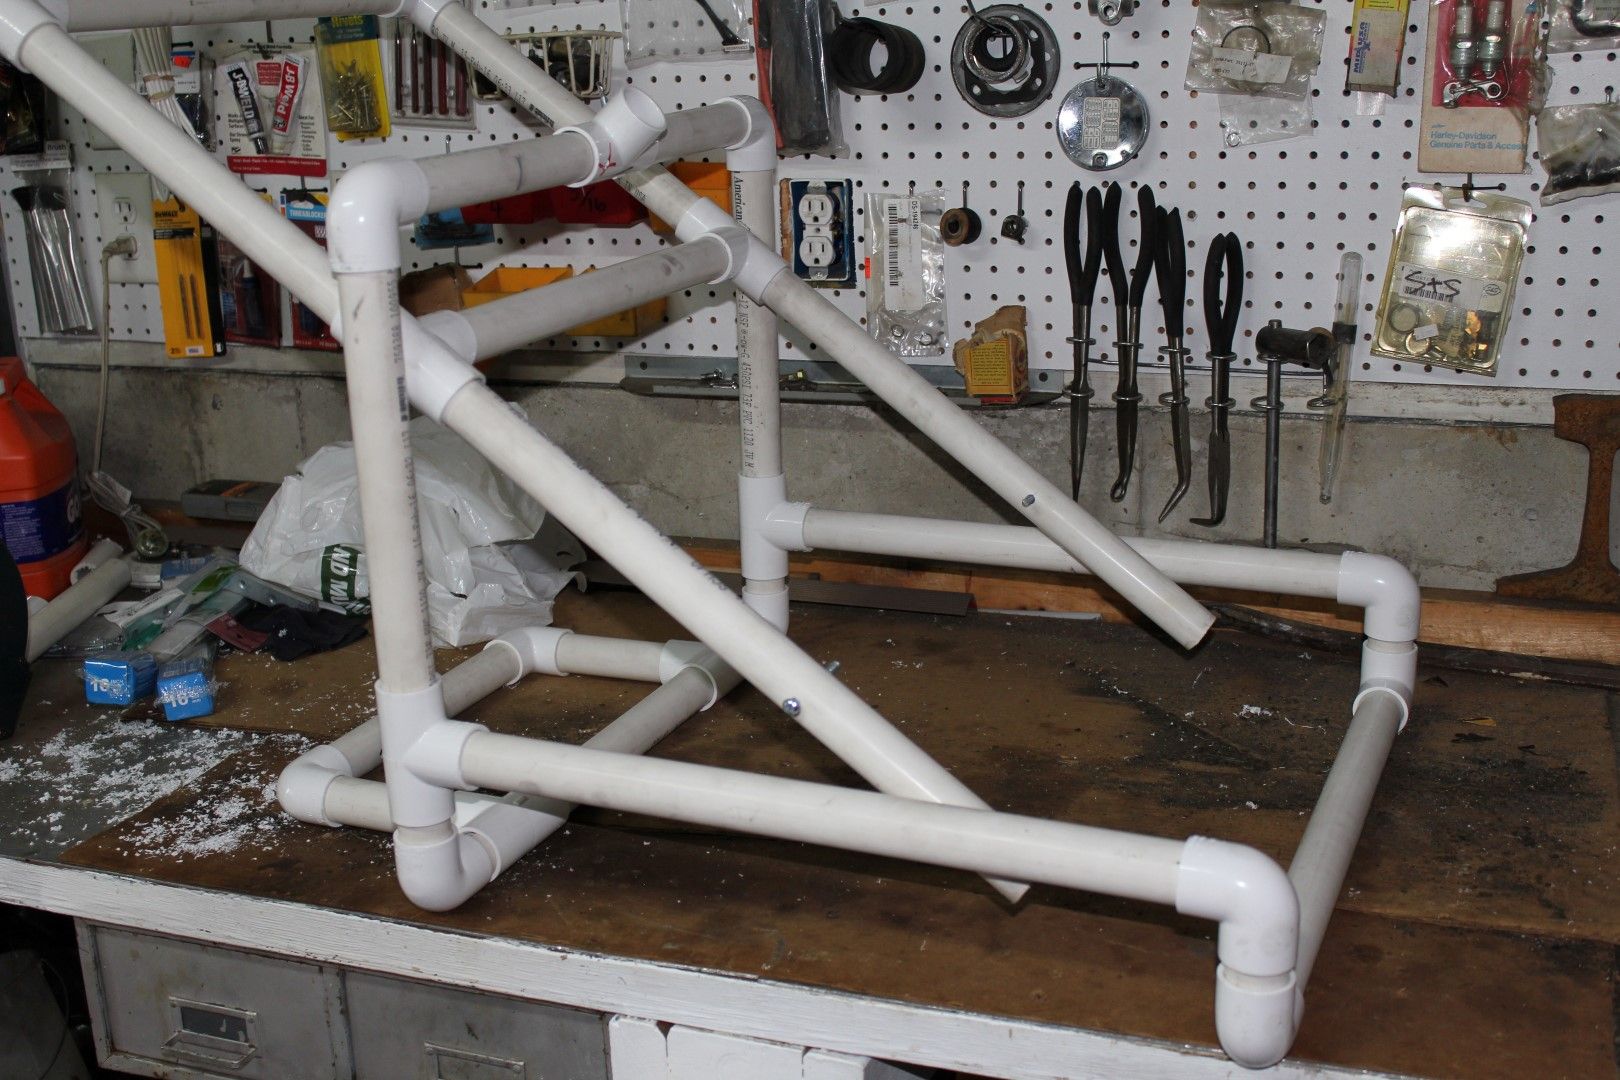
I reverted to using the plans you posted on page 5 of this thread (http://www.diybookscanner.org/forum/pos ... 14&p=17400) instead of the Instructables steps that you made. I absolutely hate to be the bearer or bad news, but it's clear now that there is an issue with your Instructables. It's evident when you look at your parts list pic posted in step 1 (You write: "...to fit a plastic platen... measuring 28cm X 35cm."), and then when you get to Step 11 where it describes making the platen (You write: "To make this I used two pieces of 3mm thick acrylic measuring 22cm x 35cm.")
Having learned that early on, I still neglected to correct the measurements for the plywood book cradle parts in time (a friend had the wood I needed), and they were cut too small:
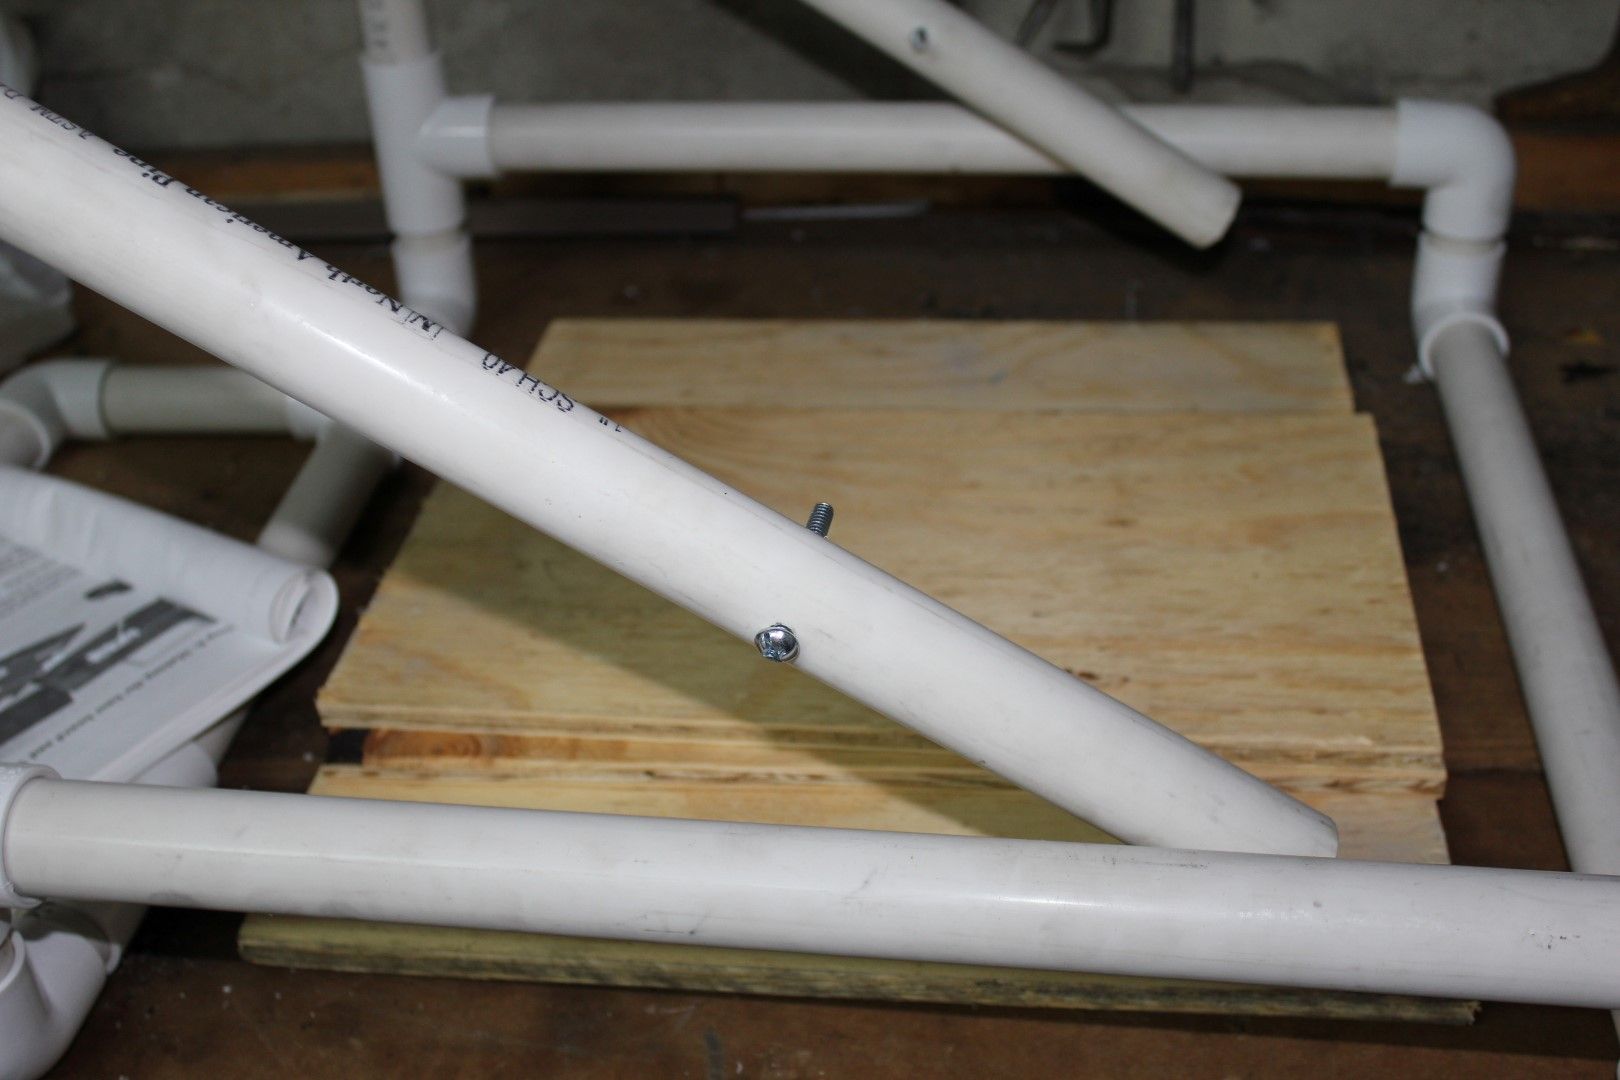
From what I could tell in the last video, the book cradle fits under the tubing frame rather tightly; just enough room for the sliders to move. I'm not sure I can make these shorter boards work. Maybe I can put a spacer in there? I don't know. I figure while scanning the book, with time there might be movement of the cradle or the rig itself which will undoubtedly throw the cameras off. I think I'll just get some new boards cut.
I appreciate that you want to do a full measurement of the machine you have on hand, David, but that's really not necessary. I've no doubt that you're a very busy man, and having to go back and edit your Instructables will be a hassle. It might just be easier to correct the platen measurement in the parts list picture, because all the subsequent steps have measurements to make the standard size scanner. Not the larger one. I almost learned that too late at the outset.
Thank you again for sharing this with us all! I've still got the camera arms and T's to cut, but the hard part is nearly over, I hope.
-
davidlandin
- Posts: 134
- Joined: 22 Feb 2012, 15:44
- E-book readers owned: kindle
- Number of books owned: 0
- Country: UK
Re: A new scanner design using plastic tubing
Hi Louroboros
Well first of all many congratulations on getting on so well with your scanner project! What you have made looks great to me.
Thanks for pointing out the discrepancy on the two platen size measurements. I am planning to get the whole machine measured once again and this time it will be using the current platen which has a 110 degree angle.
What I also want to do is make a spreadsheet where all the dimensions will be user definable. Starting with the dimensions of the largest book to be scanned, all the other measurements can be calculated. The fundamental and key dimensions of the entire scanner are the dimensions of the platen - which of course is directly determined by the size of the largest book.
I've started working on the spreadsheet and will post it when it is done.
Just a few other points.
1. Camera Mounting Unlike the earliest model of this scanner, the cameras are no longer mounted on the rocker arms. This is because I am now using DSLR cameras, and they are too heavy to be moved up and down on the rocker arm. So these are mounted on tripods instead. BUT to maintain the unchanging distance between the camera lens and the opposite side of the platen, the front legs of the tripods are (in my model) dropped into extra upward pointing Ts which are on the side bars of the lower part of the frame - that is, on the long horizontal bars that join the front to the back of the scanner.
2. Framework I see you have got white tubing, and that is OK. Your tubing looks a bit larger diameter which may give the whole framework more rigidity. You will however need to darken the white colour to avoid reflections, and I would suggest getting a can of black matt spray paint to spray everything. But even matt paint may end up a bit shiny and cause reflections in the platen whhich can be picked up by the cameras. So in addition to the black paint you may want to get some black adhesive fabric tape. I have found some excellent stuff on ebay called Hockey Stick tape. Here's a link http://r.ebay.com/uAEE6h. You can wind it round the framework and stick bits over anything that is shiny. It gives a lovely dull non-reflective surface.
3. Platen Although it is easier to make a 90 degree platen, there are some problems with 90 degrees. Most important of these is that it is a bit difficult to avoid reflections from the other side of the platen and also to take images that go right into the gutter of the book.
So I have started using a 110 degree platen, which I have constructed using narrow aluminum strip, as seen on this photo
I asked the supplier of the acrylic to cut the long edges at 55 degrees, so that when they are butted together they form a toal internal angle of 110 degrees.
Incidentally, if you can't get T shaped metal hangers to hang the platen, L shaped ones will work just as well, and I think they may be easier to find
4. Getting a flatter V-shape in the book Ideally the spine of the book should be in a slight concave curve when scanning, so that the pages present themselves to the platen in a more open V-shape. One way I have tried to do this is by using a piece of curved soft insulation material used for lagging pipes. If you cut a piece to fit between the actual spine of the book and the cover you can push it into the "slot" and this gently opens the book into a better position for scanning.
4. Recent photo Here is a picture of the most recent version of the scanner.
Well first of all many congratulations on getting on so well with your scanner project! What you have made looks great to me.
Thanks for pointing out the discrepancy on the two platen size measurements. I am planning to get the whole machine measured once again and this time it will be using the current platen which has a 110 degree angle.
What I also want to do is make a spreadsheet where all the dimensions will be user definable. Starting with the dimensions of the largest book to be scanned, all the other measurements can be calculated. The fundamental and key dimensions of the entire scanner are the dimensions of the platen - which of course is directly determined by the size of the largest book.
I've started working on the spreadsheet and will post it when it is done.
Just a few other points.
1. Camera Mounting Unlike the earliest model of this scanner, the cameras are no longer mounted on the rocker arms. This is because I am now using DSLR cameras, and they are too heavy to be moved up and down on the rocker arm. So these are mounted on tripods instead. BUT to maintain the unchanging distance between the camera lens and the opposite side of the platen, the front legs of the tripods are (in my model) dropped into extra upward pointing Ts which are on the side bars of the lower part of the frame - that is, on the long horizontal bars that join the front to the back of the scanner.
- Camera Tripod front legs dropped into Ts to maintain the distance between camera and platen
- Platen showing 110 degree angle.
3. Platen Although it is easier to make a 90 degree platen, there are some problems with 90 degrees. Most important of these is that it is a bit difficult to avoid reflections from the other side of the platen and also to take images that go right into the gutter of the book.
So I have started using a 110 degree platen, which I have constructed using narrow aluminum strip, as seen on this photo
I asked the supplier of the acrylic to cut the long edges at 55 degrees, so that when they are butted together they form a toal internal angle of 110 degrees.
Incidentally, if you can't get T shaped metal hangers to hang the platen, L shaped ones will work just as well, and I think they may be easier to find
4. Getting a flatter V-shape in the book Ideally the spine of the book should be in a slight concave curve when scanning, so that the pages present themselves to the platen in a more open V-shape. One way I have tried to do this is by using a piece of curved soft insulation material used for lagging pipes. If you cut a piece to fit between the actual spine of the book and the cover you can push it into the "slot" and this gently opens the book into a better position for scanning.
- pipe insulation material cut to help the book spine form a natural curve
4. Recent photo Here is a picture of the most recent version of the scanner.
-
Louroboros
- Posts: 5
- Joined: 03 Sep 2016, 15:22
- E-book readers owned: Sony
- Number of books owned: 99999
- Country: US
Re: A new scanner design using plastic tubing
Thanks so much for the response, David! Yes, I've still got a ways to go with my frame - cleaning it up and masking the color and hanging the platen, etc. I'm still waiting for some parts to come in that I ordered last month, even. (I thoroughly scoured this thread through multiple readings, and took notes as I did, so I think I picked up the best tips!)
I absolutely LOVE your new mods! I'm wondering what DSLR's you're using for your new setup; camera and lens combo? Are you using just one camera, as displayed in your last photo, or two? (Two might be a bit expensive!) Also, moving to a 110 degree platen will involve building another frame, but can you alter your existing book cradle to the new angle? Additionally, given previous comments in this thread from some time back, did that involve raising your lamp to reduce glare?
I'll anxiously (but patiently) await the spreadsheet you mention for dimensions on your varying platen angles and frames. My gratitude knows no bounds!
Re: A new scanner design using plastic tubing
Hello David,
For fun and to help me visualize the structure, I made LEGO models for your 3 designs.
Here is the link where you can download the official Lego Designer application : http://ldd.lego.com/en-gb/download?ignorereferer=true
Here are the links for the book scanners :
version 1 : http://www.datafile.com/d/TWpFMk1qQTRNemcF9
version 2 : http://www.datafile.com/d/TWpFMk1qQTRNemsF9
version 3 : http://www.datafile.com/d/TWpFMk1qQTRNemMF9
I guess some things can be made a better way, so feel free to suggest any modification needed.
Also, the black pieces are supposed to be glued but the blue ones are not.
Regards,
M