A Nominal Build

Built a scanner? Started to build a scanner? Record your progress here. Doesn't need to be a whole scanner - triggers and other parts are fine. Commercial scanners are fine too.

Moderator: peterZ

Post Reply
StevePoling
Posts: 290
Joined: 20 Jun 2009, 12:19
E-book readers owned: SONY PRS-505, Kindle DX
Number of books owned: 9999
Location: Grand Rapids, MI
Contact:

A Nominal Build

Post by StevePoling »

I am reticent to begin this thread, because it does not show any particular creativity in solving any design problems in building a book scanner. I hewed very closely to Dan's 2nd Generation design as documented in his Instructible PDF (http://www.instructables.com/id/DIY-Hig ... d-Cheap-C/), innovating only at two points: 1) camera mounts, 2) platen. To solve the former, bought two tripods and to solve the latter I stole sdati's "air platen" idea (http://diybookscanner.org/forum/viewtopic.php?f=1&t=254). I use Dan's trigger electronics with two Canon A590 cameras and the firmware hack described in Dan's Instructible. Lighting is from some high-wattage halogen lamps from what I call drywall lights.

Here is a photo from a month or so ago:
Image
You see 20-24" of kitchen counter on a 2x4 frame with a vertical member rising from the rear exactly as Dan describes in his Instructible. Only point of interest is the now-obsolete bit of plywood clamped to the splash guard. The plywood is notched for the "thumb thing" bar.

Lighting consists of 2 halogen lamps from the partially-disassembled drywall lights.
Image
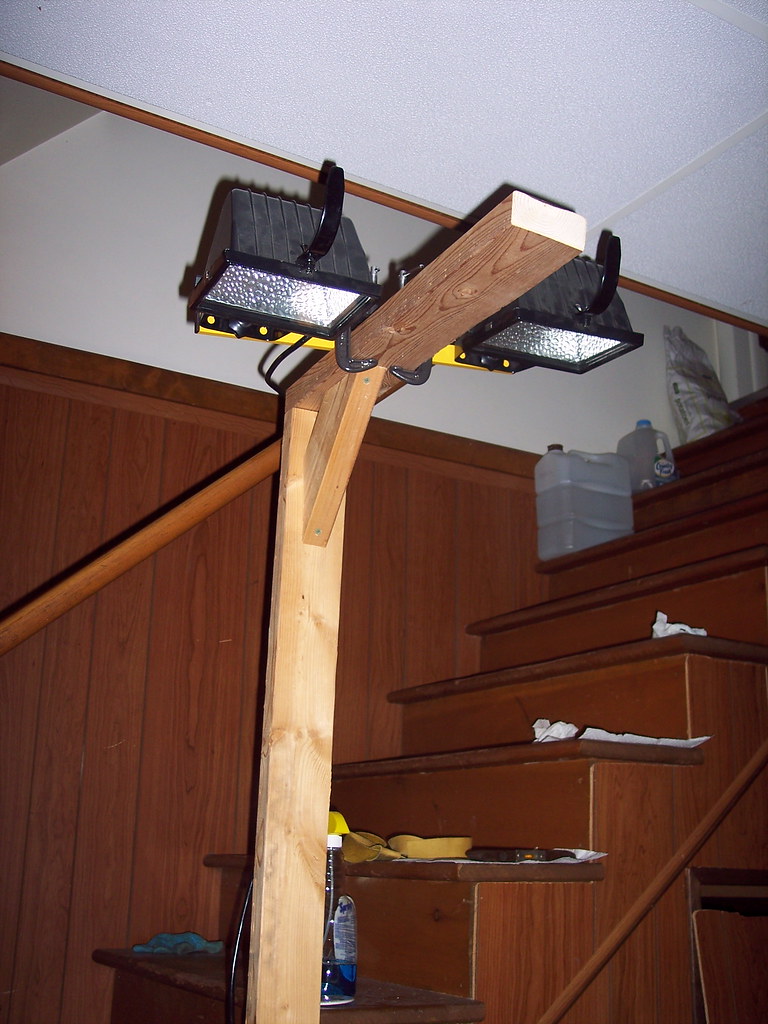
You'll note I've used C-clamps in honor of Dan's design principle to affix lamps to the "gallows." And you'll note that the drywall lights' wire guards have been removed. The height of the lamps is such that there's little risk of my burning myself on the fixtures or glass. I've just got to make sure I don't lose those guards before I need the drywall lights for something else.

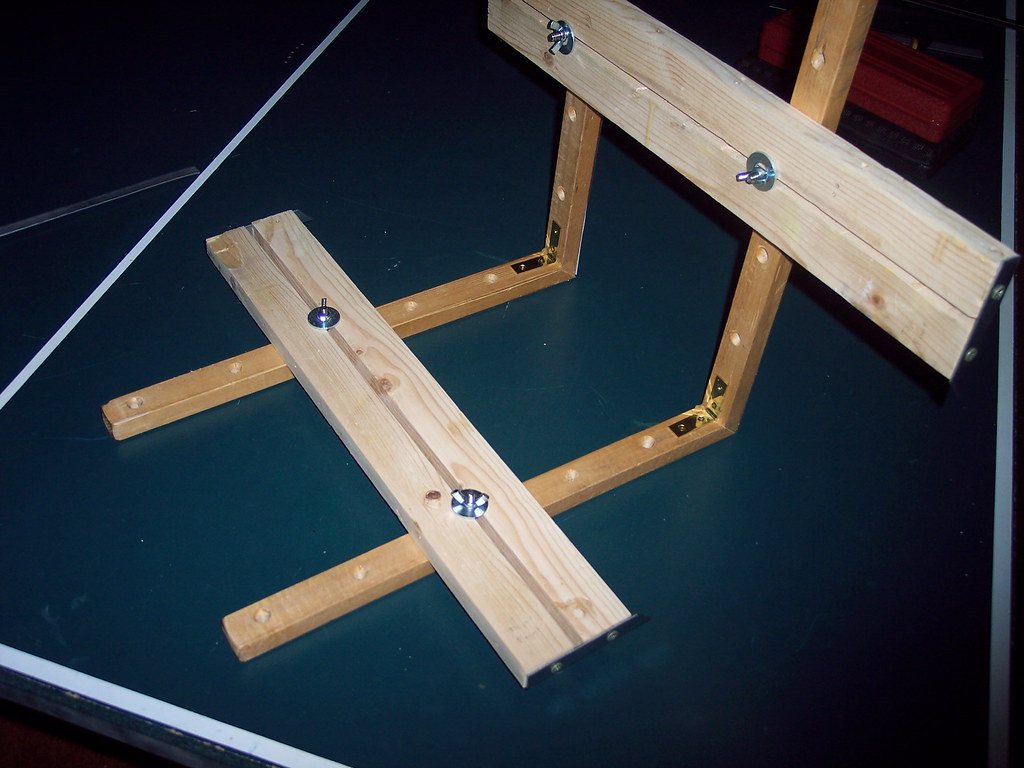
This shows my abortive attempt at building an integrated camera mount and the result of my saying, "screw it," and buying two tripods.
Image
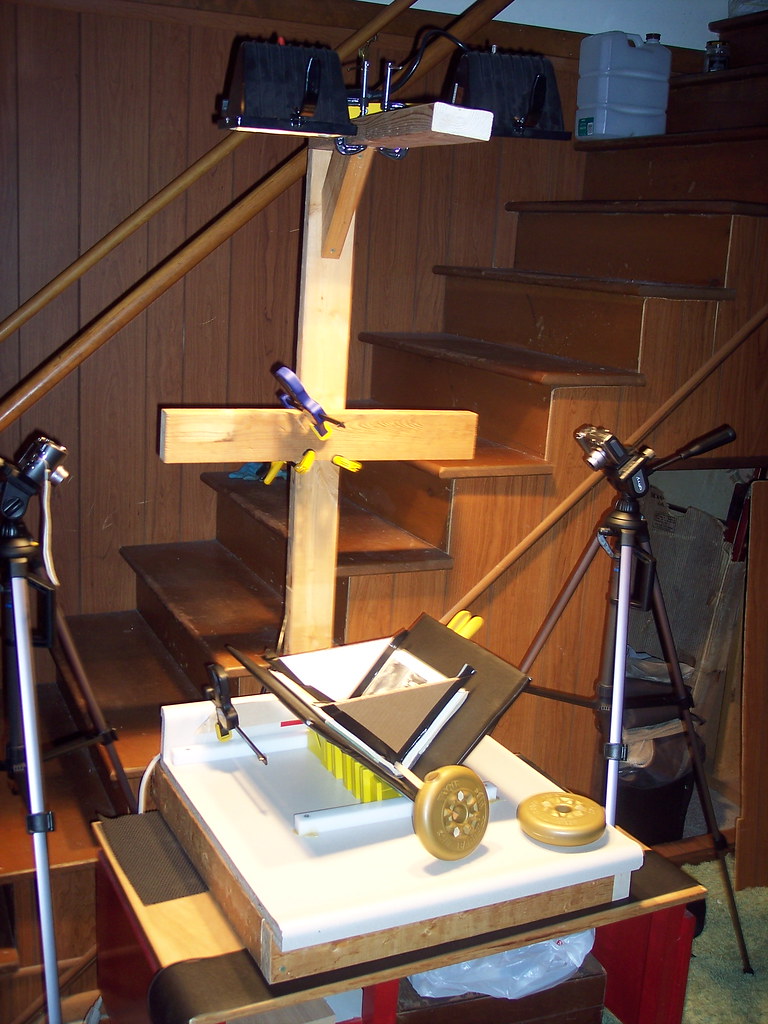
You'll note that I hope to put both cameras on arms extending outwards from a cross-piece clamped to the vertical member. Little problems like keeping everything square and isolating the cameras from vibration sufficed to motivate the purchase of two cheap tripods from the local Meijer's Thrifty Acres. Also visible here are the Mark 0 Cardboard "thumb things" that worked passably well.

This side view shows everything except for the cabling.
Image
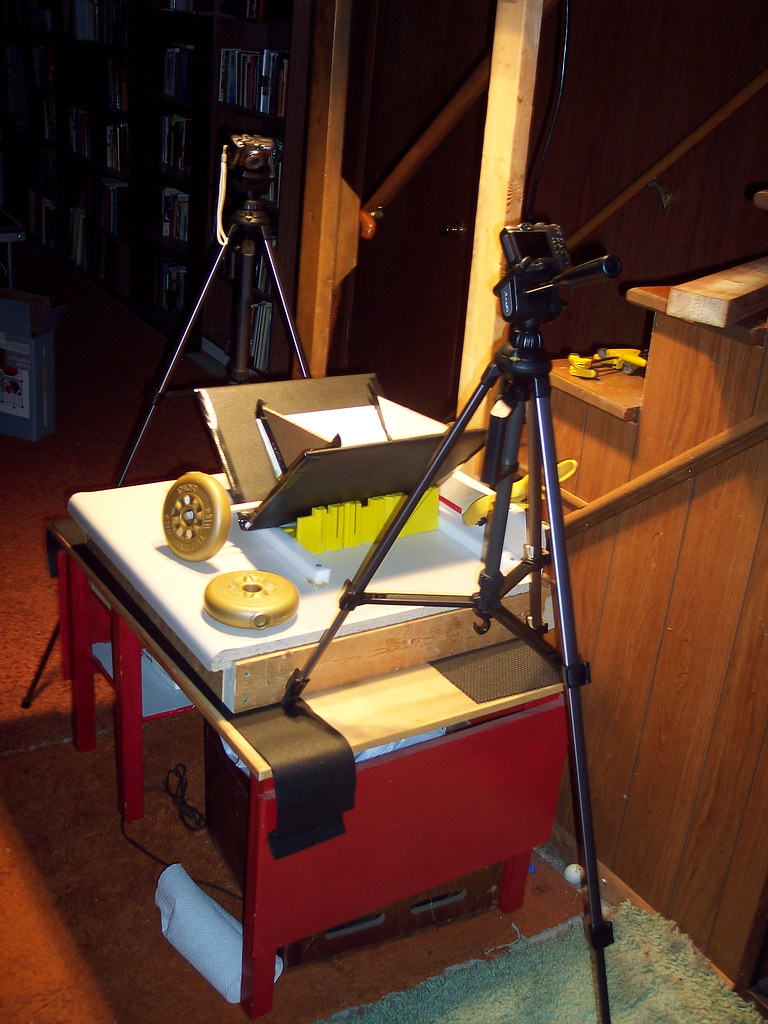
Note the bookcases in the dim background. They are filled with volumes crying out "digitize me."

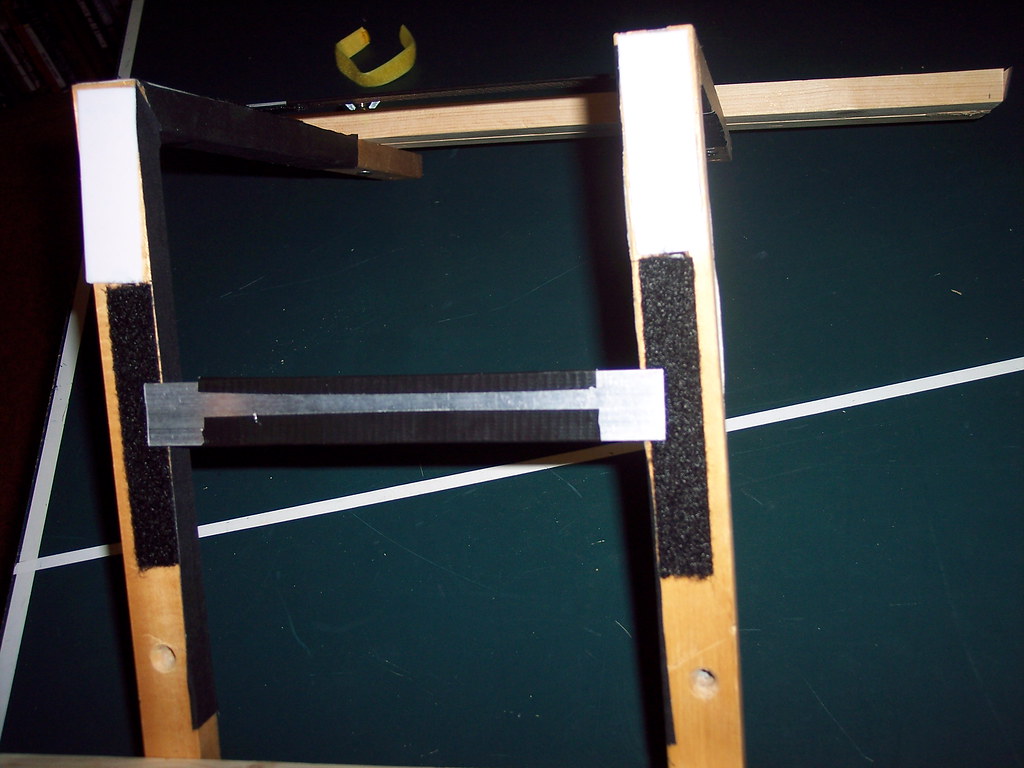
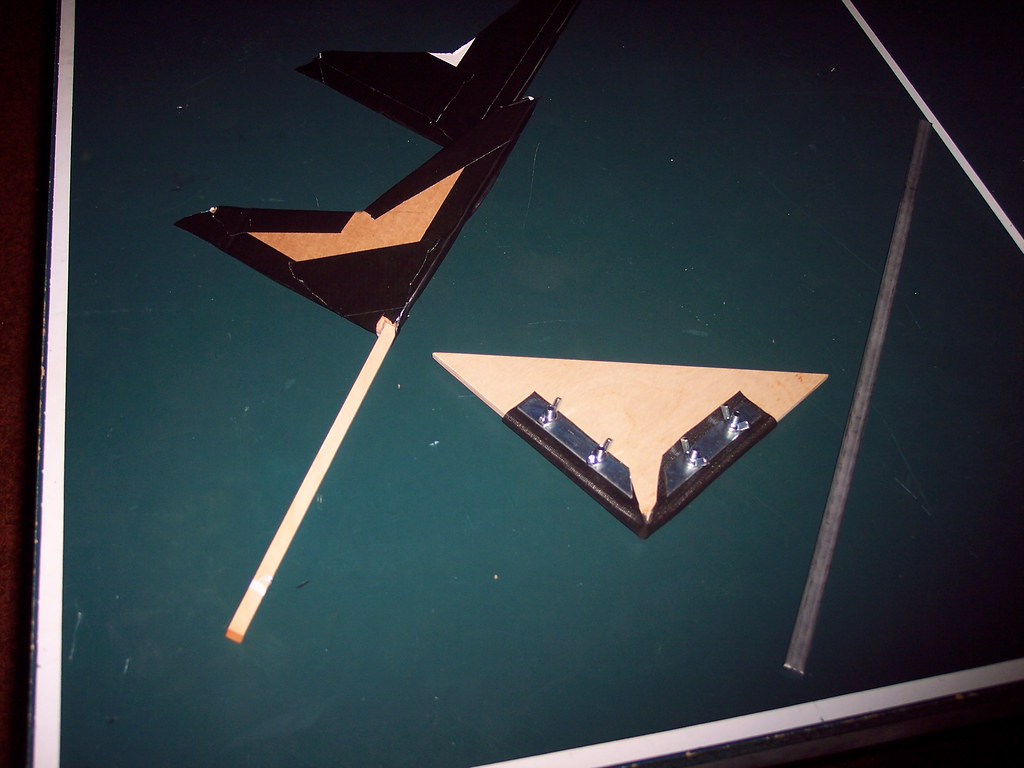
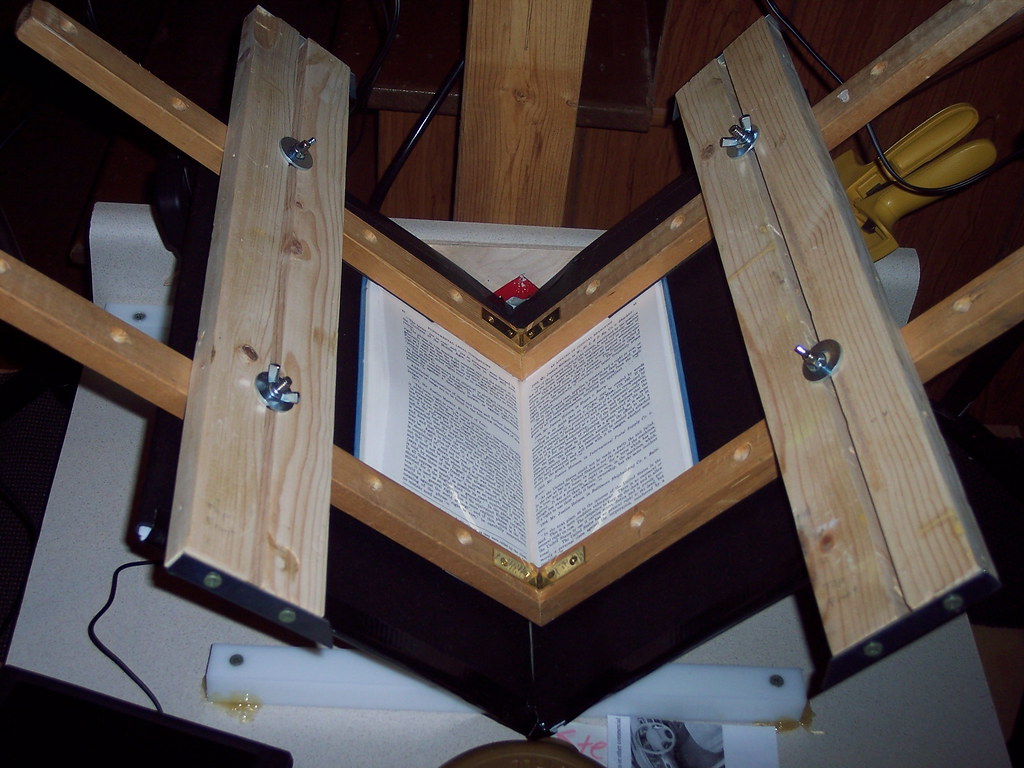
The Mark 1 Plywood "thumb things" consisted of a bit of leftover black shelf material (Don't use bike inner-tube material.) stretched over triangular bits of plastic with straps bolted down. They worked surprisingly well, but the shiny bits needed to be covered with black duck tape, not shown. (Non-shiny gaffer's tape preferred.) Image

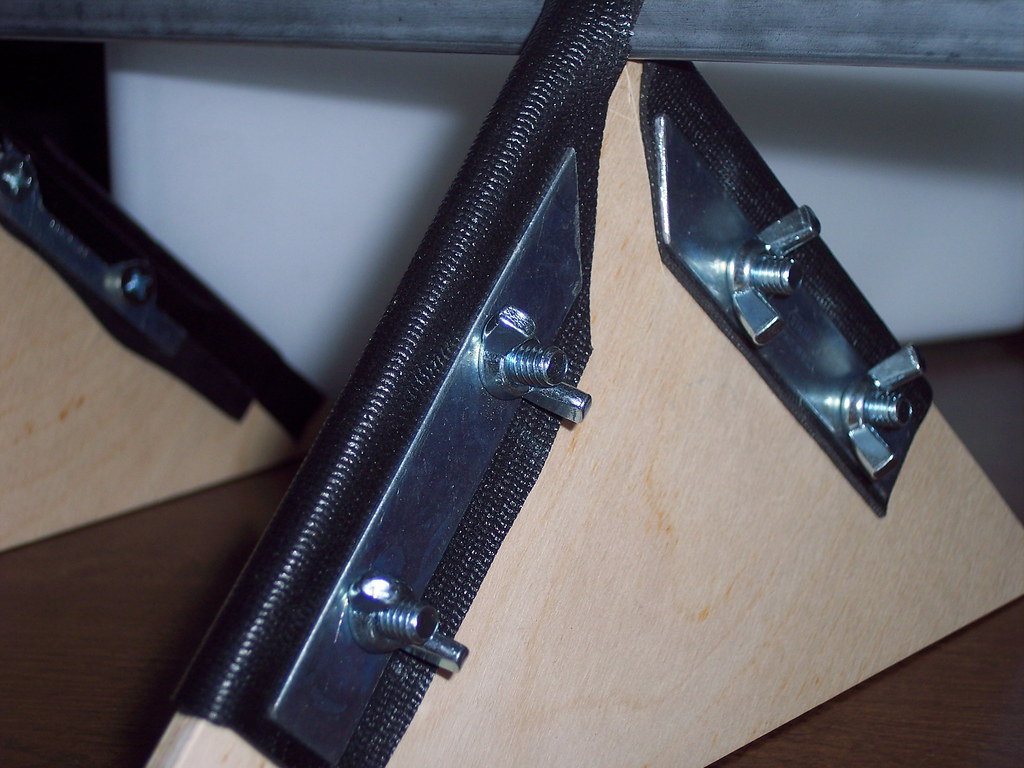
You can see the Mark 0 and Mark 1 thumb things here.
Image

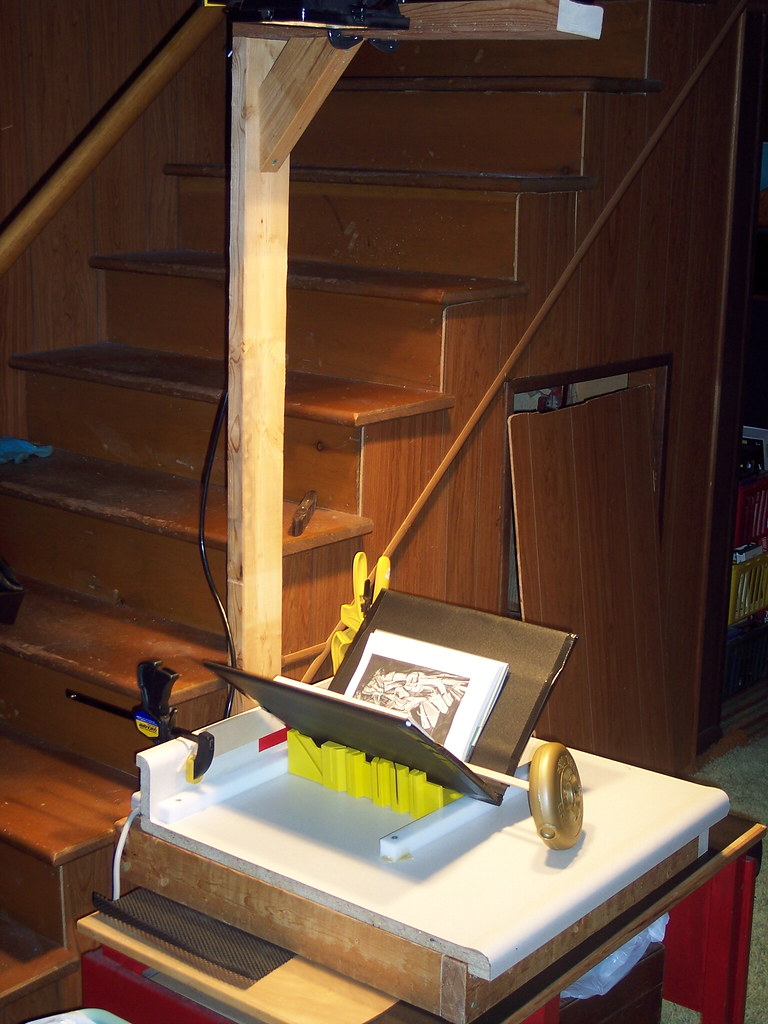
Thumb Things were superceded by sdati's air-platen, which I stole, and my implementation is shown here:
Image
I made it too big, but the raw material, a stick from an old hammock, had regularly spaced holes that mostly worked to give me some adjustability.

Here's an action shot showing the air-platen.
Image
Those nifty brass corner supports I added are beautiful, but they contribute undesirable reflections. Good thing I finally got some flat-black gaffer's tape.

My one innovation to the air-platen is a bit of teflon that eases contact between air-platen and book-gutter.
Image
(You'd think I'd know to get the focus/macro right.) Another element that does not work are the rubberized magnets which are too week to hold anything. They'll be replaced with Velcro when I get back to work on this project.

The result of all this folderol looks something like this:
Image
Sadly, the image manifests keystone distortion. Is this because I didn't set up the camera right, and it's looking at the page from an angle? I think so. Is it because the pages tend to "bow out" from the top and bottom margins, curving toward the camera? I think that, too.

Problems:
1) Setting manual focus or locking the focus on the Canon A590 requires puttering around. I'd like to set it once and leave it unchanged.
2) Same goes for zoom. But every time I turn off the cameras, they forget. Whenever I change memory chips, I have to reset zoom and hope it's consistent with last time.
3) When I trigger the cameras, sometimes one fires but the other does not. Or worse, one fires, and the other waits until I've got my hand in the frame changing the page, and then it fires.
4) What are the ideal camera settings for this fixture?
5) Can keystoning be removed via correct camera placement/aim/zoom?
6) Which improvements for the air-platen are indicated?
sdati

Re: A Nominal Build

Post by sdati »

It's nice to see this info all in one place even if it isn't anything really new. For your last two issues I have a couple thoughts based on my experiences.

For the keystoning you should be able to correct for most of that by adjusting the height of the camera - I notice that in your design you put the camera mount cross pieces above the Vs - when I built mine I made the decision to put them below to ensure I could keep the camera low enough. For the page bowing, I couldn't find a better solution than the piece of metal across the edge of the page.

I do have some wild ideas involving monofilament line, but haven't had a chance to try them yet...
StevePoling
Posts: 290
Joined: 20 Jun 2009, 12:19
E-book readers owned: SONY PRS-505, Kindle DX
Number of books owned: 9999
Location: Grand Rapids, MI
Contact:

Re: A Nominal Build

Post by StevePoling »

sdati wrote:I do have some wild ideas involving monofilament line, but haven't had a chance to try them yet...
I like the way your mind works. That's an excellent idea. But how can it be made to work...
spamsickle
Posts: 596
Joined: 06 Jun 2009, 23:57

Re: A Nominal Build

Post by spamsickle »

I've shelved my design for a combination glassless platen / automatic page turner temporarily, because there don't seem to be any affordable tractor beams on eBay or Craig's list.

On your points 1 and 2, I'm using a Custom setting on my camera, which seems to remember the zoom and manual focus. Just to be on the safe side, I'm also setting the focus in my CHDK script. I expect your camera has a Custom setting too -- I adjust the white balance, zoom, focus, aperture, and shutter speed, then save them all as a custom setting. Next time the camera is turned on in "C" mode, it sets itself. I haven't had to futz with the camera settings for months.
StevePoling
Posts: 290
Joined: 20 Jun 2009, 12:19
E-book readers owned: SONY PRS-505, Kindle DX
Number of books owned: 9999
Location: Grand Rapids, MI
Contact:

Re: A Nominal Build

Post by StevePoling »

spamsickle wrote:I've shelved my design for a combination glassless platen / automatic page turner temporarily, because there don't seem to be any affordable tractor beams on eBay or Craig's list.
I don't suppose you could fake it with a vacuum, blower combination? I wonder whether you could focus an acoustic pulse at the page.

How big a deal is it to muck about with customizing the CHDK firmware?

Tell me more about your Custom settings. I take it you can set the camera some way and then tell it to remember that particular configuration. I'm going to have to reread my A590 camera manual...
spamsickle
Posts: 596
Joined: 06 Jun 2009, 23:57

Re: A Nominal Build

Post by spamsickle »

I just discovered this afternoon that the only thing I really need CHDK for is to keep the camera from sleeping when I walk away for a couple of minutes in the middle of a scan. The way I discovered this is realizing halfway through the SECOND book I was scanning that I hadn't bothered to enable the CHDK functionality at all. The two shutters were still firing, and the manual settings were still getting me the focus and exposure I expected.

Yes, take a look at the camera and the manual. The Custom mode on the Canons I'm currently using for my DIY scanner is represented by a "C" on the dial at the top of the camera. On my old DSLR, it was "MR" on the dial for "Memory Recall". There was even a custom mode on the point-and-shoot which my wife is using. I think it's a standard feature now on almost all digital cameras.

On my Canons, I set everything the way I want it -- focus, exposure, white balance, zoom -- and then save them by pushing the "Menu" button on my camera and finding my way to "Save Settings". From that point on, any time I turn the dial to "C", the camera remembers all those settings. On my DSLR, I could save five different custom settings, but the Canons and the P&S only save one. One is all I need for scanning books anyway...
StevePoling
Posts: 290
Joined: 20 Jun 2009, 12:19
E-book readers owned: SONY PRS-505, Kindle DX
Number of books owned: 9999
Location: Grand Rapids, MI
Contact:

Re: A Nominal Build

Post by StevePoling »

I just went through my Canon A590 IS manual and didn't see any custom settings save function described anyplace. Is this something I have to get a more expensive camera to have? I don't think i'm the only one with a Canon A590. Does anyone else who uses this camera have any preferred settings s/he is willing to share?
spamsickle
Posts: 596
Joined: 06 Jun 2009, 23:57

Re: A Nominal Build

Post by spamsickle »

I found a copy of your camera's user's manual online, and it looks like you're right, there's no custom setting.

You can set shutter speed, aperture, and focus in your CHDK script. The settings I'm using are:

set_tv 21
set_av 9
set_focus 560

I haven't done exhaustive searching, but the only information I've seen on setting zoom in CHDK is the ability to click "Zoom in" or "Zoom out", but not to set a specific zoom value. I assume it would still be possible to set a specific value by clicking "Zoom out" some large number of times, to zoom out to the maximum value, then click "Zoom in" a set number of times to zoom in to a specific value.
StevePoling
Posts: 290
Joined: 20 Jun 2009, 12:19
E-book readers owned: SONY PRS-505, Kindle DX
Number of books owned: 9999
Location: Grand Rapids, MI
Contact:

Re: A Nominal Build

Post by StevePoling »

Camera settings continue to be the long pole of the tent. As mentioned in Dan's tape thread, I've covered my air platen in gaffer's tape (until I ran out) to reduce undesired reflections. And I've also modified the underside. Gone is the rubber magnets to hold the sides in place. Gone is the narrow-gauge wire on the sides.

For the sides of the air-platen I cut two strips of aluminum for the sides and applied adhesive pads of Velcro hooks to the ends. Then I applied adhesive strips of Velcro loops to the underside of the air-platen. (And applied black duck tape to the aluminum side pieces.) The result is an altogether usable air-platen with only one handicap: The side pieces are unkind to the edges of the pages they hold down. Some more sheet Teflon may be needed.

I'll take some photos and post them later, Mrs. has called me to dinner...
StevePoling
Posts: 290
Joined: 20 Jun 2009, 12:19
E-book readers owned: SONY PRS-505, Kindle DX
Number of books owned: 9999
Location: Grand Rapids, MI
Contact:

Re: A Nominal Build

Post by StevePoling »

Here's the current state of my air-platen. You'll note that I've applied gaffer's tape. But it isn't obvious in this shot of my inverted air-platen. Note the addition of Velcro to the underside and the aluminum side-piece that it is holding to the v-things' arms.
Image

The side-pieces are detailed here. They consist of aluminum strips with Velcro and duck tape affixed.
Image

Here's a page imaged with the air-platen. (Yeah, it's a dupe of the snap in Dan's "tape" thread.)
Image

Note the black tape doesn't quite reach all the way to the Velcro loops square. Note the fuzzieness of the gaffer's tape near the top, (yeah, that's a problem.) and the shine of the duck tape on the right.

The Velcro holds the side-piece lower than the v-arm. This can catch the edge of the page. If you're not careful, you'll dog-ear the page.

Operationally, I bend over the book, lift the air-platen, reach inside the air-platen to flip the page, then reset the air-platen being careful to smooth the pages and their edges flat. Then hold down the trigger until you hear both cameras fire. You're best advised to do this with a friend who'll spell you when your back begins to ache.
Post Reply